Photo Guide: Making High-Quality GIFs From Photos Using DaVinci Resolve 18
I’ve noticed a trend that has popped up on social media in the last year or so and it is making GIFs from photos. I see this almost exclusively for sports photography but it can be used from many different styles/genres of photography. I think the increase in popularity for this technique is due to the high FPS (frames per second) that newer cameras are able to shoot at for photos. This high FPS has allowed cameras to essentially take photos as fast as it would take video (around 24 FPS and up). This gives the illusion of video (with high quality photos) and can make for some great content.
For my GIFs, I used to use a free website called EZ GIF. And no knock on this site, it definitely gets the job done, but I wanted something that could hold onto the quality of my photos, be able to do it offline should I need to get them out quickly at a remote shoot and do it very quickly. I ended up using DaVinci Resolve 18, a video editing software that I use for making IG reels and other videos.
This software is free and allows for a crazy amount of flexibility. To keep it simple, I added the photos that I wanted in the GIF into a timeline and adjusted their times. That’s it. From start to finish I was able to make a GIF in less than a minute as long as I used preset settings.
So here is how I did it (I have included a photo walk-through at the bottom as well):
Open DaVinci Resolve 18
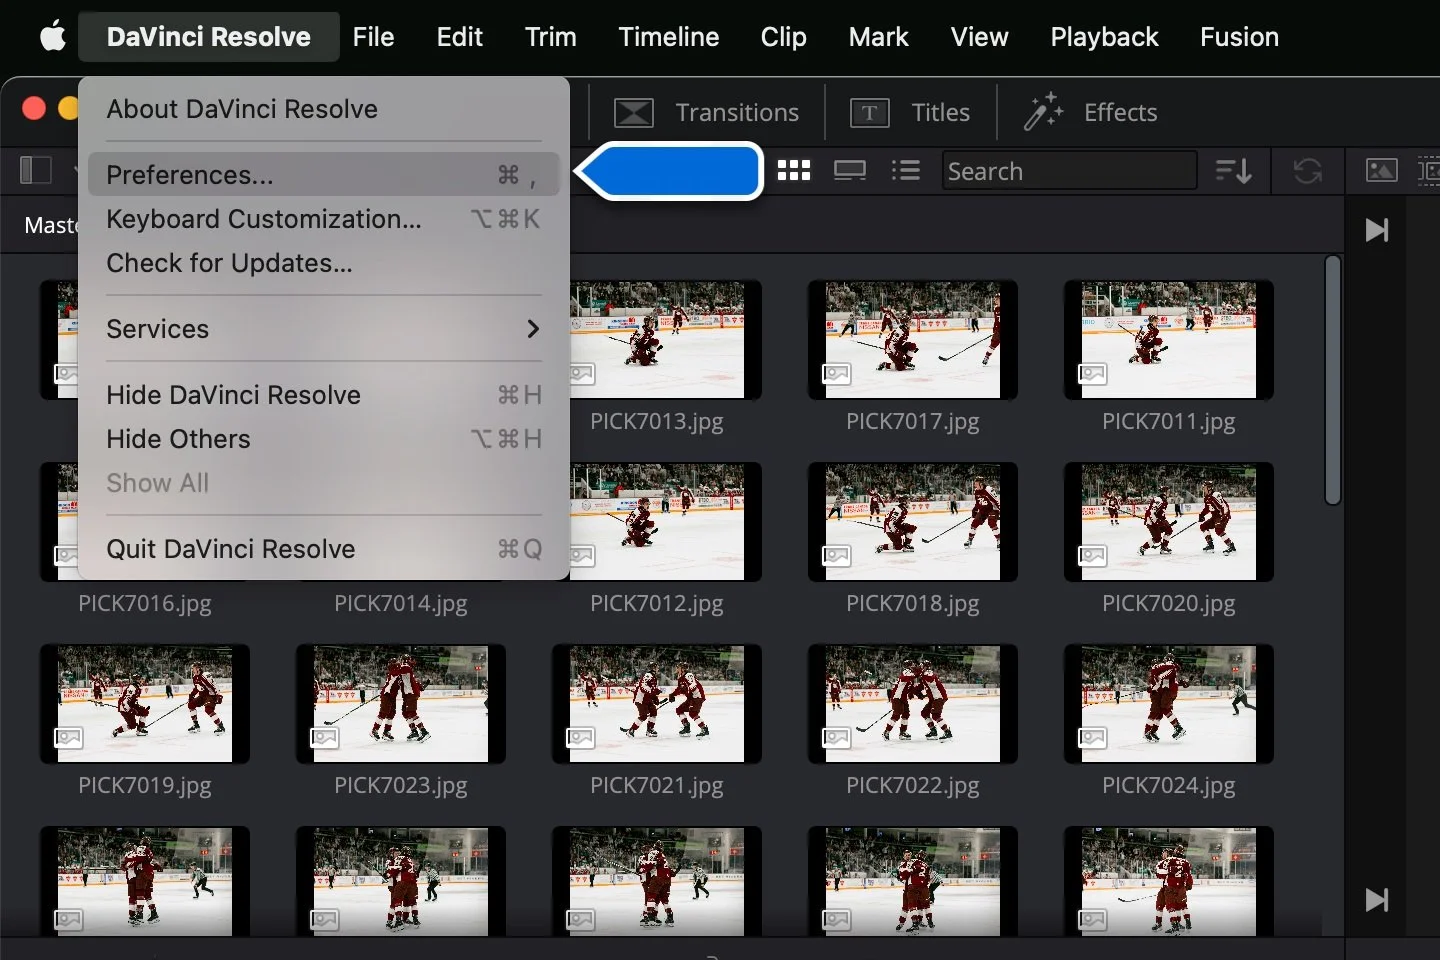
In the top left part of the screen select DaVinci Resolve, then Preferences
Select User then Editing on the sidebar
Scroll down to General Settings and find the Standard still duration
This is where personal preference comes in. You can select seconds or frames to adjust the length of the clip, I personally chose frames. You can now change how long you want the clip to be. I was shooting with my Canon R6 at 12 FPS with the mechanical shutter and set the frames to 3 (my timeline is also at 30 FPS). Your camera’s FPS and the frames/seconds that you select will dictate how fast or slow your clip is and how smooth or choppy it is. If you want to intentionally want it to look choppy you can increase the frames/seconds and vice versa for smoother.
Import (press Command “i”) all of your photos either directly from your camera or from a folder with all of the edited photos (I personally export all of my photos from Lightroom into a folder and grab it from there, it makes it much easier to locate and keep track of).
Put the photos you wish to include in the GIF onto your timeline (I use the Cut tab for this). Ensure that they are in the correct order (I found that sometimes it can import out of order and make the GIF a total mess).
Watch it through a few times, make sure it's the speed you want it to be. I have not figured out how to adjust the speed of all of the photos all at once when they are already on the timeline. You can do it individually but it takes a crazy long time. If you don’t like the speed I suggest deleting all of the photos off the timeline/import space and revisiting Step 4 until you are satisfied with it.
Go to the Deliver tab. Now you have a preference on how you want to export it. If you’re happy with DaVinci’s crop then you can just export it from there and you’re good to go. If you want to keep it at a 2x3 crop, scroll to Resolution and set the dimensions to Custom then to 3240x2160 (this was the largest resolution that I could find for exporting at this crop).
Select Add to Render Queue (bottom left) then Render All (middle right).
And that’s it! This should have taken you a few minutes to do but once you have those settings saved you’re able to pump out these GIFs in less than a minute. I will also preface that the larger the photo’s file size is the cleaner the GIF will look. I personally maxed my file size for my photos at 1MB but it’s all personal preference. Hopefully this guide helped!